Adding digital instrumentation
While the Ninja 250 has an analog speedometer and a resettable trip mileage meter, neither is usually very accurate and both vary with tire size. Typically the speedometer reads higher than the true speed and the indicated mileage is greater than the true mileage by at least several percent. With stock tires, the 3rd generation 250 Ninja speedometer reads about 8% high and the mileage is about 4% high.
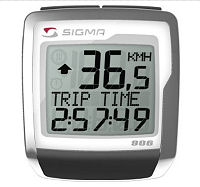
There is a way to add more accurate instrumentation at low cost though. For under $40 you can add an accurate digital speedometer, oddometer, trip mileage meter, clock, trip timer, average speed indicator and maximum speed recorder. All you have to do is add a "bicycle computer"!
A bicycle computer simply records the number of times the wheel revolves in a given time and calculates speed from that. Distance is calculated by simply measuring wheel revolutions. You input the wheel circumference and the computer does the rest. Most operate by attaching a magnet to the wheel and placing a small pick up transducer on the front fork. Each time the magnet passes the transducer it induces a small voltage when the magnetic field crosses a coil of wire in the transducer. The "computer" records this voltage pulse and uses it to calculate and display the speed and distance functions.
The best way to measure the circumference of the tire (which you'll need to input into the computer to get and accurate speed and distance readout) is to measure the distance traveled in one revolution. Chalk a mark in the tire and the ground, then sit on the bike and roll forward one revolution and make a second chalk mark on the ground. Then measure the distance between the chalk marks. This is quite accurate. My calibration gave speed and distance results within 1% of those I got by using a GPS system to measure speed and distance. Some bicycle computers can't handle the speed of a motorcycle and give up over about 50mph, but the Sigma models generally are good up to high speeds. Since they run off a small battery they don't typically have a backlight, or if they do you have to push a button to turn it on and it only stays on for a few seconds. If you want constant illumination for night use, you'll have to add an external LED powered from the bike's electrical system.
Of course bicycle computers are designed to be mounted on bicycles, not motorcycles. The magnet is designed to attach to the spokes of a bicycle wheel, so you have to use some ingenuity to attach it (or another suitable magnet) to a motorcycle wheel. Similarly the pick up transducer is designed to be mounted on one arm of the front fork of the bicycle and it has to be positioned so that the gap between it and the magnet is no more than 1 or 2 mm. Again some ingenuity may be required to attach it to the motorcycle fork and get the gap small enough for the unit to operate reliably. The stronger the magnet, the larger the gap can be.
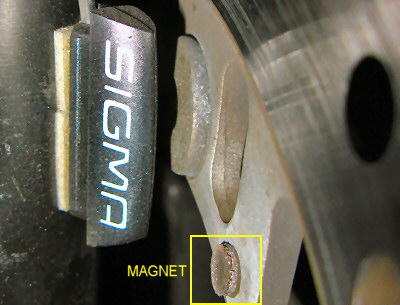
With the Ninja 250 I attached a small rare earth magnet (very strong, available from Radio Shack or Harbor Freight) to the inside edge of the front disk brake rotor, well away from the area contacted by the brake pads. It holds on pretty well magnetically, but I epoxied it in place using JB Weld epoxy. The pickup sensor was mounted on the fork leg as shown in the illustration on the left using double sided foam tape. It's held just fine for over a year now.
Since bicycles may be a little smaller than the Ninja 250 and the wiring route on the motorcycle may take a few extra turns, the distance between the transducer on the fork and the readout unit mounted somewhere near the instrument cluster may be more than the length of the supplied wire, so you may have to splice in an extension. You need some "slack" in the wiring to allow for movement of the suspension and steering. There are also wireless models if you don't like the thought of running an extra wire from your wheel to your dash, but they may not be quite as reliable and they need an extra battery in the sending unit.
You may have to use some ingenuity in mounting the display, but given some epoxy putty, cable ties, self tapping sheet metal screws or stick on velcro, it shouldn't be too hard to figure out a place and method of mounting it so that it can easily be seen while riding.